Any navigation link in HarmonySite can be customised by an administrator. Administrators can also add new navigation links, where required, or remove navigation links that are not needed.
About Navigation Link Access Levels
As with most elements of HarmonySite, each navigation link has an "access level" - the level of access that a logged-in member has to have in order to see the navigation link, and thus be able to access the page that the link points to.
Note:
- A navigation link's access level is separate from the access level of the page that the navigation link links to. This means that it's possible for someone to have an access level that allows them to see a navigation link, but if the page that the navigation link points to has a different access level, the member may not be able to see the page itself - or vice versa.
- Just because a navigation link can be found in one of the "public" menus (such as Contact, About, News & Events, etc), doesn't mean that the navigation link (or the page it points to) is actually visible to the public. The visibility of the navigation link is governed solely by its access level, not by what menu it sits in. For example, it's possible to have a page's navigation link found in the About menu, but that page and navigation link are only visible to members. So someone who is not logged in will simply not see the link to the page in the About menu. The link will only be seen after they have logged in.
Site Navigation Menu tool
HarmonySite provides a tool that allows you to easily and visually arrange your site’s navigation menu (and all the navigation links therein). To find this tool:
- Log into the Members Area as an someone with admin privileges over the "Navigation Links" system
- Click the Admin link in the top-right corner to display the Administration Dashboard.
- Scroll down to the Site Navigation Menu line, and click on the Site Navigation Menu link to the right of this in the Admin Pages column. This displays the Site Navigation Menu Layout page, shown here..

The Site Navigation Menu tool lets you drag menu items (navigation links) to their new position within a menu, or into a completely different menu. Entire menus can also be dragged left and right. Navigation links can be updated and deleted (and added) directly from the same page. It's all very visual and easy, and works exactly the way you would expect it to.
In addition to instructions on the tool’s operation at the top left of the page, there are a couple of notes, and they are repeated here:
- There is no "save" button - any changes that you make are saved instantly.
- You won't see your changes reflected in the site's menu at the top of the page until you refresh the page (or visit another page).
Adding a Navigation Link
To add a new navigation link:
- Log into the Members Area as an administrator
- Click on the Admin link in the top-right corner to display the Administration Dashboard.
- Scroll down to the Site Navigation Menu heading, and click on the Site Navigation Menu link to the right of this in the Admin Pages column. This displays the Site Navigation Menu Layout page.
- Click on the Add new navigation link button at the top-right of the Site Navigation Menu Layout page (circled below). This displays the Navigation link Details page.

The fields on the Navigation link Details page are described below:
Text to display
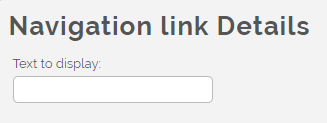
The Text to display field (shown above) is the text that's actually shown in the site's navigation menu. Examples include: "Book Us!" or "Visit a rehearsal", or even "Members" (the main menu containing all members' options).
If you are creating a navigation link with a blank/custom icon (see below), the text in this field will be superimposed on the blank icon. In such circumstances, be careful to enter words into this field that will fit within the bounds of the icon.
Page from this website
The Page from this website drop-down list (shown below) contains the names of all pages in your HarmonySite. The page that you select will be the page that this navigation link "points to". In other words, when your member or site visitor clicks on the navigation link, they will be taken to this page.

Note that there are two circumstances where it is not necessary to select a page from this list:
- The navigation link is an actual menu heading (e.g. About, Contact, Members)
- You enter a full URL in the box below the drop-down list, as shown below...

Any regular web page address, such as https://www.google.com, can be entered into this box, but only if no page has been selected from the Page from this website drop-down list.
The next group of fields are in the Where is the navigation link displayed section of the Navigation link Details page:
Parent
A "parent" in this context is a menu heading from the site's navigation menu, such as Home, Contact, About, News & Events, or Members. Most of the navigation links you create will live under one of these menu headings. In such circumstances, you must select a Parent for your navigation link from the drop-down list. For example, if you selected the “Public Access – News & Events” parent shown below, your navigation link will appear on the News & Events site menu.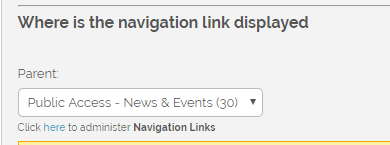
Do not include in menus
Most navigation links are included a site menu (under a "parent"). If you do not wish for your navigation link to appear in any menu, tick the box called Do not include in menus (shown below)...

You would typically tick this box only in the following circumstances...
- You want the link to only appear as an icon in the Members Options area of the main Members page, but not in the Members menu itself.
- You want the link to appear on the Administration Dashboard.
Display Ranking
The navigation link's Display ranking (shown in the image above), is a number that determines in what position this navigation link will appear in its menu or in the set of icons on the main Members page. Navigation links with lower numbers (e.g. 20) appear before links with higher numbers (e.g.50).
Notes:
- It can take a lot of trial and error to get a navigation link's position in the menus exactly right, by entering a Display Ranking number, then saving the navigation link, then checking the menu, then returning to update the navigation link and entering a different number, etc. It's much easier to use the Site Navigation Menu tool, and simply drag-and-drop navigation links to their correct positions.
- It is not possible to reorder the navigation links on the Administration Dashboard. Adjusting their Display ranking number has no effect on the display of navigation links on that page.
Members Page icon
As you may be aware, each icon on the main Members page is also a navigation link. Such navigation links look like this on the main Members page...

Which actual icon image is shown for the navigation link on that page depends on the value typed into the field called Members Page icon, as shown below...
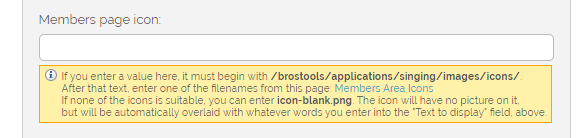
Valid values for this field must be the full file name (including folder name) of an icon file on the server. An example of a full icon file name is:
/brostools/applications/singing/images/icons/icon-member-database.png
Note that the /brostools/applications/singing/images/icons/ part (the folder name) is always the same. It's the file name (in this case icon-member-database.png) that varies from icon to icon. If you need to enter a file/folder name from scratch, do the following...
- Copy-and-paste the above folder name /brostools/applications/singing/images/icons/ into the field
- Click the link called Members Area Icons in the yellow help box under the field. This will open a new page (in a new browser tab) that displays all available icons.
- Determine which icon you want
- Copy-and-paste the filename of your selected icon into the field on the original browser tab, appending it to the end of the folder name. For example, if we want the Clothing Sizes icon, copy the filename, icon-clothing-sizes.png
- The result will look like this...

Custom Icons
If none of the available HarmonySite icons meets your needs, you can select the icon called icon-blank.png, and create a custom icon. Such icons will have no actual picture on them, but they will still have text on them, specifically the text from the Text to Display field, as described above.
Note:
Any navigation link that has a Parent of Members (see above), with an Access Level Required of Limited Member Access or Regular Member Access (see below) will be displayed on the main Members page, regardless of whether the navigation link has an icon filename specified. If no icon filename is specified, then the navigation link will not display as an icon, but instead will appear on the main Members page as a simple link under all the regular icons on that page.
Members Page text
The Members page text field (shown below) is used for icons on the main Members page, as well as links on the Administration Dashboard.
On the main Members page, this text is shown as a little "help tip" that appears when you hover your mouse over the icon. An example is shown below...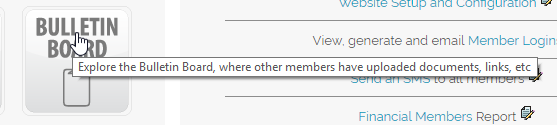
For links on the Administration Dashboard, this text gets displayed as the actual link on the page.
Display ranking in footer
Similar to the Display Ranking field above, the Display ranking in footer number (if specified) is the position in which this navigation link appears in the website's footer site map. The footer site map is the informational section that appears at the bottom of many of the site's public-facing pages (for example, the Home page) that displays a selection of navigation links. Note that not all HarmonySite websites have a footer site map. A typical footer site map may look like this (your own site's footer colour will likely be different)...

You have full control over which navigation links appear in your site map. Specifically, navigation links that contain a number in the field called Display ranking in footer will be displayed in the site map.
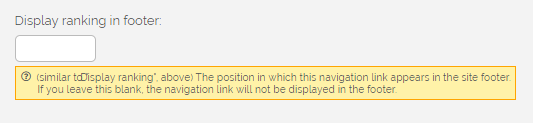
If you leave this field blank, the navigation link will not be displayed in the footer Site Map.
The next group of fields are in the Who can see it section of the Navigation link Details page:
Access Level Required
The Access Level required drop-down box specifies the minimum access level that someone must have to see the navigation link, and thus click on it to get to the page that the link represents.
If you select an Access Level required of Data Administration Access, as in the example above, you must also select the area of the system that this navigation link relates to, from the second drop-down list.
For more information on Access Levels, see our guide on Understanding HarmonySite's Access Levels.
Only display up to
This is an optional field which, in practice, is very rarely used. If you select an access level here, the navigation link will not be displayed to anyone with an access level above that level.
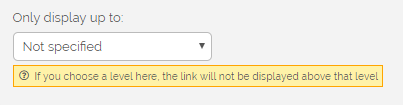
For example, if you want your link to be visible to the public but not to logged in members, you would select Public Access for the Access Level Required field (above), and Limited Member Access for this field.
When you are finished entering the Navigation link details, click Save at the bottom of the page.
Was this article helpful?
That’s Great!
Thank you for your feedback
Sorry! We couldn't be helpful
Thank you for your feedback
Feedback sent
We appreciate your effort and will try to fix the article