When you upload photos to your homepage slideshow, it's a good idea to make sure that the photos aren't too large.
The most important reason is: the bigger the photo, the longer it will take to download. So, if you have really big photos, it will make your homepage much slower to load.
When our customers see a really nice photo that they think would look great in their Home page slideshow, they often simply upload the original image, exactly as it came out of the digital camera. Such photos are completely inappropriate for a website - not because of the photo's content, but because of the photo's size. A photo straight out of a digital camera is likely around 12 Megapixels (or larger), which may be around 4000 pixels wide by 3000 pixels high. They are thus around 3 MB (Megabytes) in size, which takes a long time to load in any web browser.
Further, if you decide to do any graphics work on the photo before uploading it, such as adding a caption, a border, or other enhancements, your graphic design software will often then save the file in "PNG" format, which can make it about 10 times bigger (in bytes), meaning that it could be up to 30 MB - a ridiculous size for any website.
So you will most likely need to crop and resize your photos, as well as ensuring they're in JPEG or WEBP format, before uploading them to your HarmonySite. You would do that on your computer.
What size the photo should be depends on which theme you're using.
If you're using the Stockholm theme with a banner slideshow like this...

...then the correct size for the banner photos is exactly 1150 x 448 pixels.
If you're using the Mercury theme, like this:

...then you should aim for the photos to be approximately 1200 x 850 pixels.
The photos will simply fill the screen, so it doesn't need to be exact.
(This also applies if you're using the Stockholm theme with a "full-screen" slideshow.)
If you want to resize a photo to fit certain dimensions, a good method is:
- Crop out any unnecessary width from the photo.
- Resize the photo to the correct width.
- Crop the photo to the correct height.
I'll show you how to do this on Windows, using FastStone Image Viewer, and Mac, using Preview.
Of course, you can use different programs if you want. Any photo-editing software that supports cropping and resizing (i.e. all of them) will work.
I'll also show you how to export the photos as JPEG files.
JPEG or WEBP files are best, because they will be the smallest and most efficient. PNG files are to be avoided, as they are generally much larger than their JPEG/WEBP alternatives.
How to resize a photo on Windows
(using FastStone Image Viewer)
- Go to the photo in FastStone Image Viewer.
- You'll see the image size and file size here:

- Click the Crop Board button here:
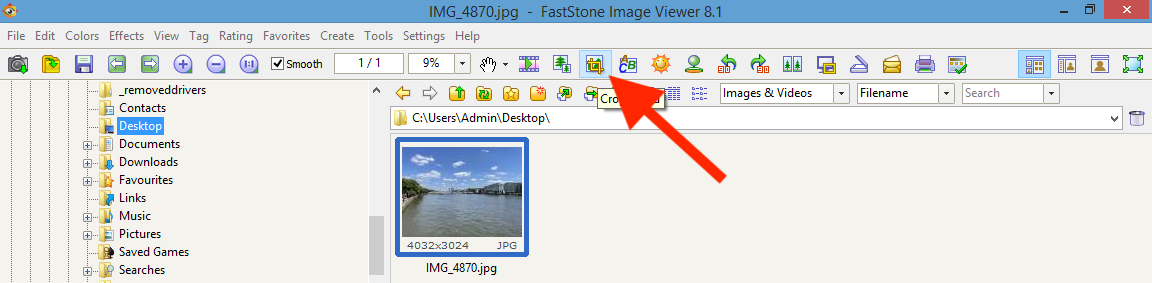
- I would recommend that you first crop out unnecessary width.
Press Ctrl+A to select the whole photo.This will put a faint box around the photo, with white circles which you can drag to adjust it:
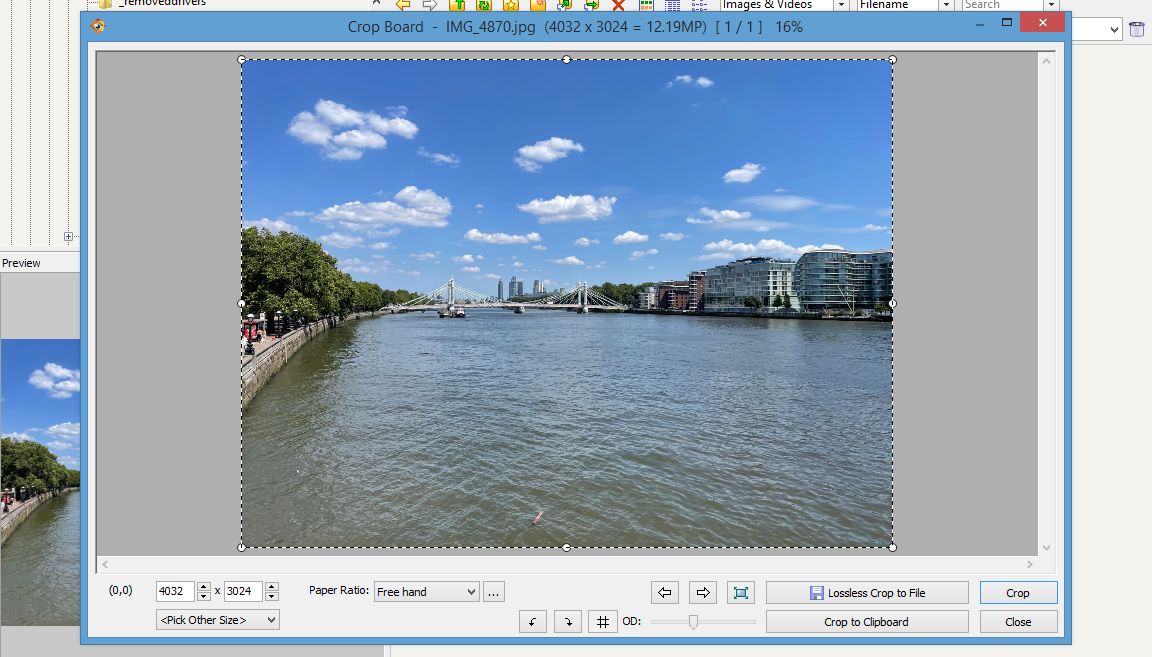
- Drag the left and right white circles to focus on the bit you want, then click Crop:

- Now, I'd recommend to resize the photo to match the required width.
Click the Resize / Resample button here: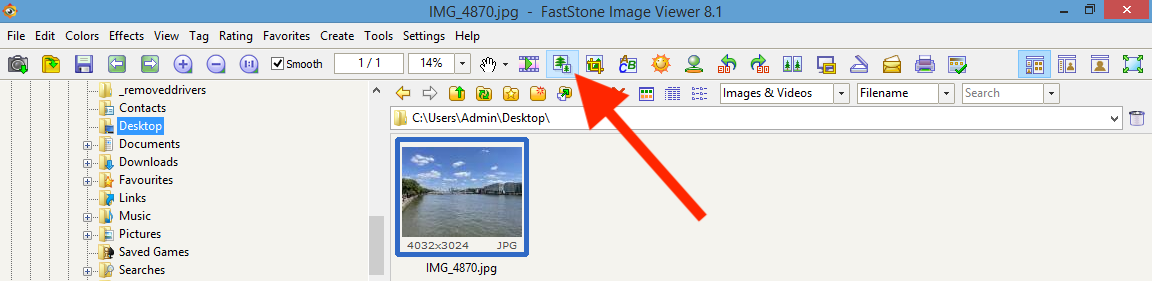
- Change the width to the width that you're aiming for.
In this example, let's aim for 1200 pixels.
Then click OK:
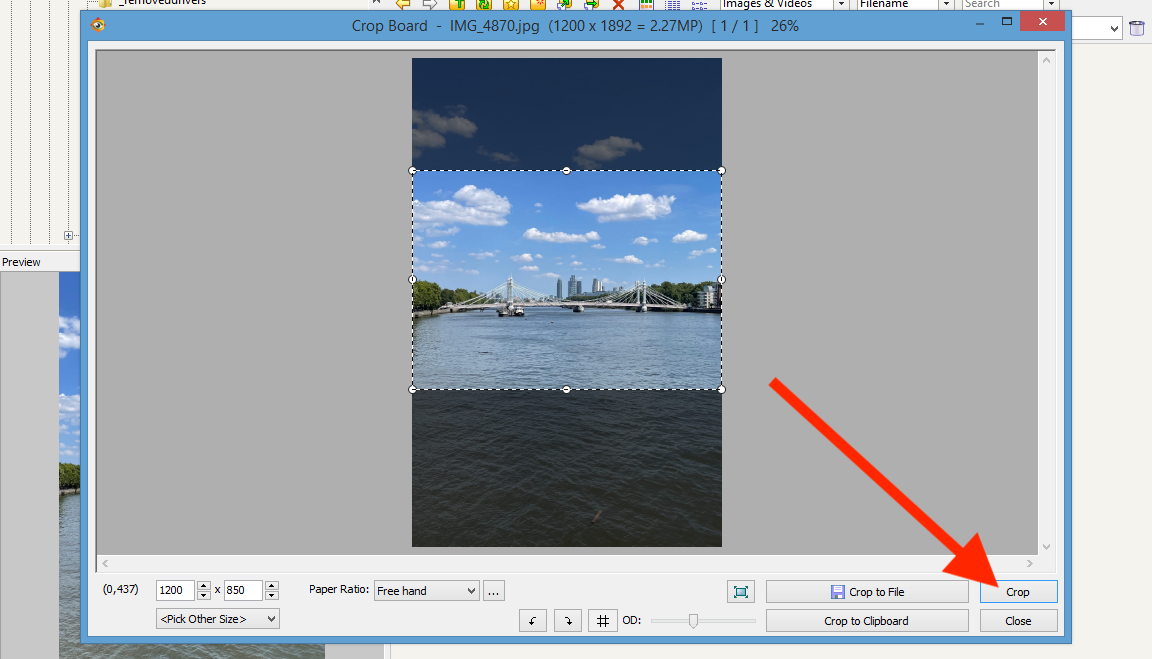
- Finally, crop the image to the correct height.
Click the Crop Board button again:
- Press Ctrl+A to select the whole photo:

- Type in the height you're aiming for – in this example, 850 pixels:

- If you need to, you can drag this box up and down to get it exactly where you want it:

- Click Crop:
- Now, we need to save the photo.
Click the Save button in the top-left corner: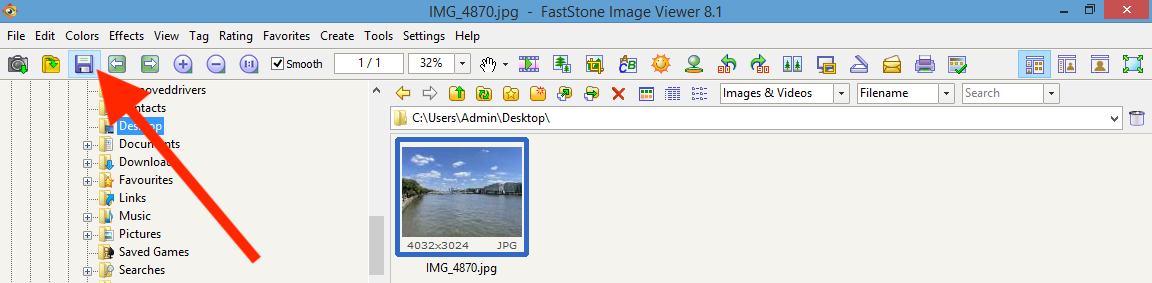
- You'll probably want to give the photo a descriptive name.
Most importantly, make sure that JPEG is selected:
- Click Save.
How to resize a photo on Mac
(using Preview)
Note: the buttons may look a little different depending on your version of Mac OS. However, you should still be able to follow these steps.
- Open the photo in Preview.
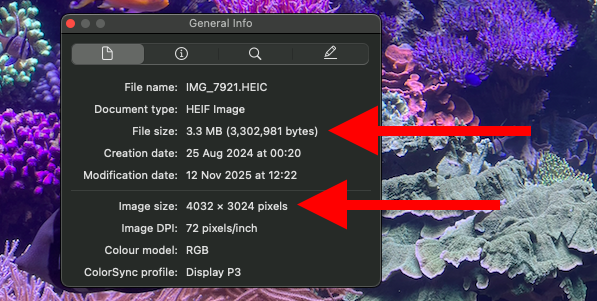
- If you want to check the photo's details, click on the button which looks like an "i":

- This will tell you information about the photo, like the current file size and image size:
- To begin editing the photo, click the button which looks like a pen tip in a circle:
 This opens the "markup" toolbar, which gives you more buttons for editing photos.
 - Click the "zoom out" button to zoom out a little:
 (If you have a trackpad, you can also pinch two fingers together to make the "zooming out" gesture.)
 - Click Edit, then click Select All to select the whole photo:

- This will put a faint box around the photo, with blue circles which you can drag to adjust it:
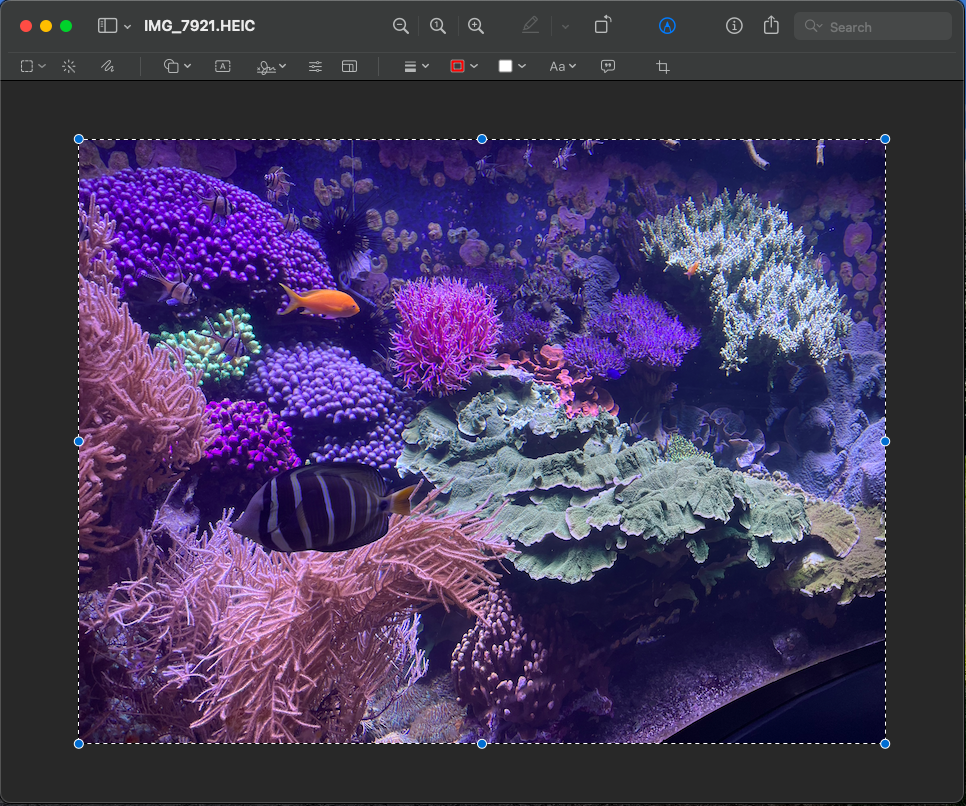
- I would recommend that you first crop out unnecessary width.
Drag the left and right blue circles to focus on the bit you want, then click the Crop button here:
- Now, I'd recommend to resize the photo to match the required width.
Click the Adjust Size button here:
- This will pop up a box where you can edit the image dimensions:

- Change the width to the width that you're aiming for.
In this example, let's aim for 1200 pixels: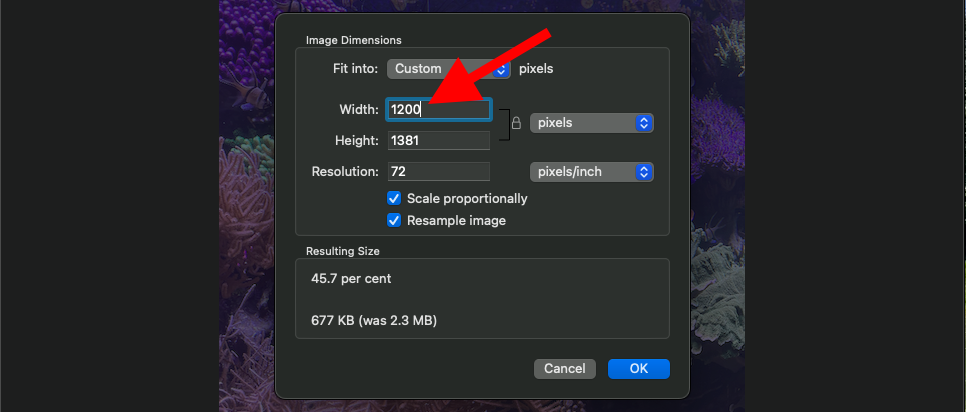
- Click OK.
- Finally, crop the image to the correct height.
Click Edit, then Select All again. - Drag the top and bottom blue circles to focus on the bit you want.
When you do this, it will also tell you the dimensions that you'll get.
Aim for the height you want – in this example, 850 pixels: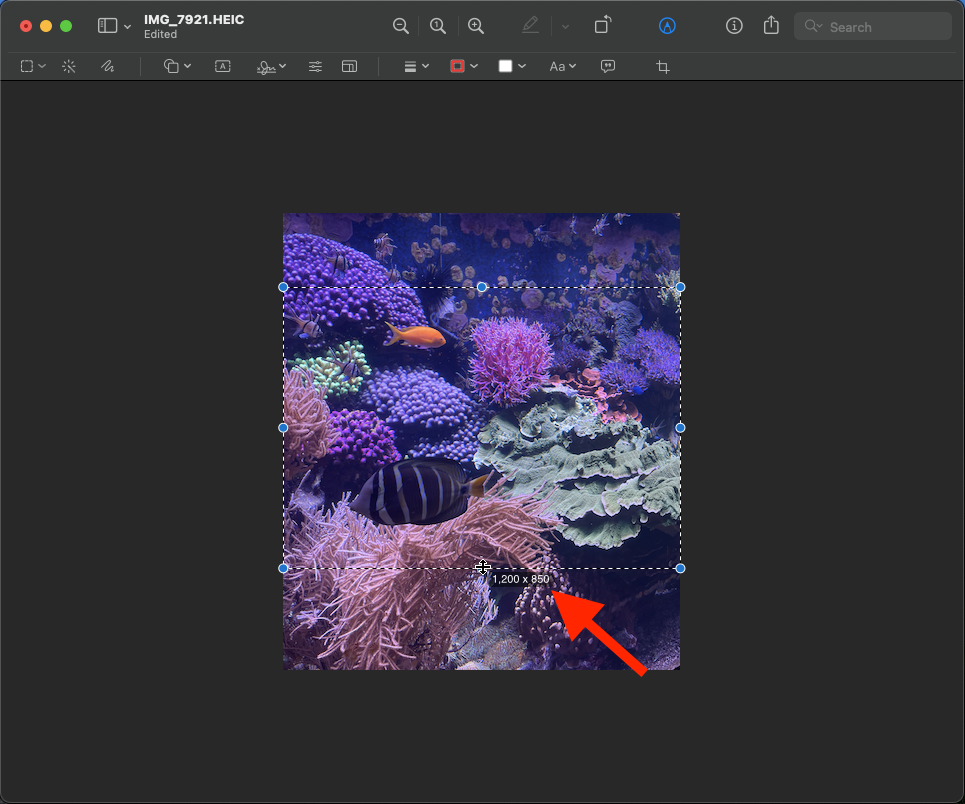
- Click the Crop button:

- Now, we need to save the photo.
Click File, then click Export...: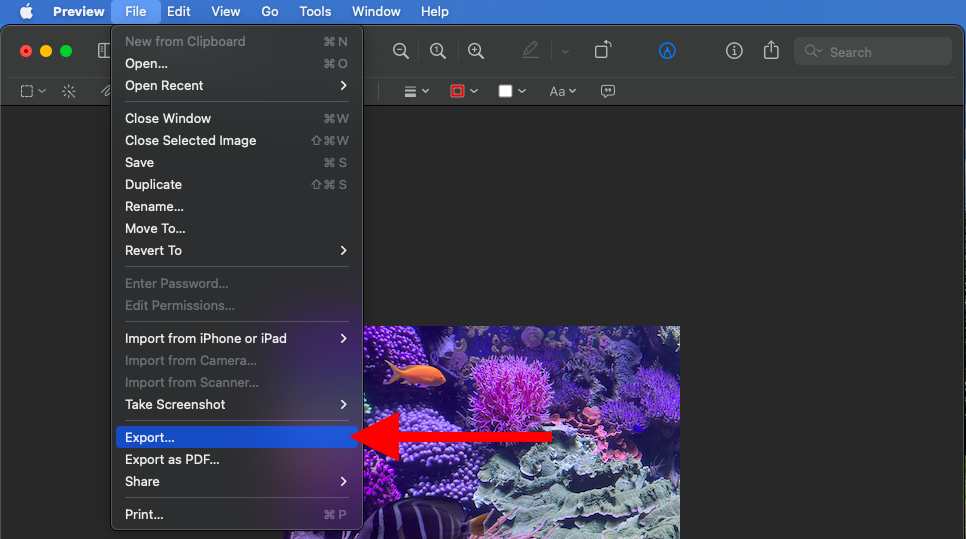
- You'll probably want to give the photo a descriptive name.
Most importantly, make sure that JPEG is selected:
- Click Save.
Was this article helpful?
That’s Great!
Thank you for your feedback
Sorry! We couldn't be helpful
Thank you for your feedback
Feedback sent
We appreciate your effort and will try to fix the article